Configuration
In order to take advantage of all the features when creating a Map, it is necessary to make some configurations in your AdminOLT account. This is important because if these configurations are not done, it could lead to inconveniences in your map creation experience.
How to configure my AdminOLT to create Maps?
These are the main configurations needed to use network maps:
Add Google Maps keys
1 Go to the Settings > Google Maps section, here you will have to add your corresponding keys.
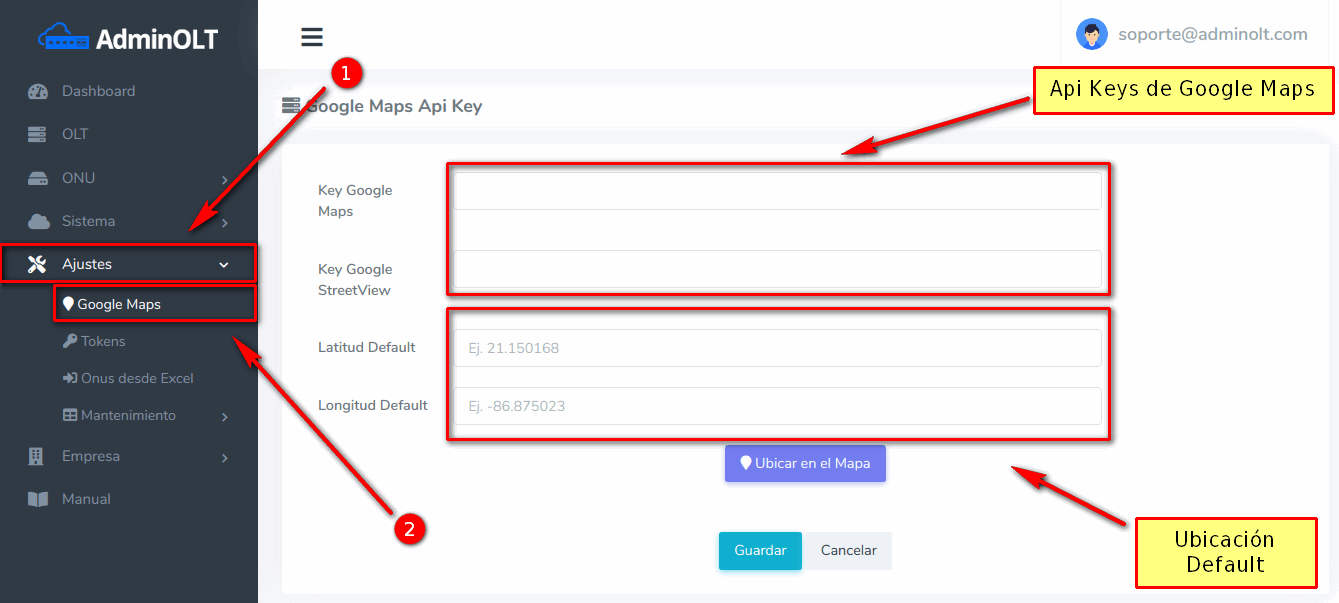
For more information on how to obtain your Google Maps keys, you can read the following article Google Maps Api Key where it is explained in detail.
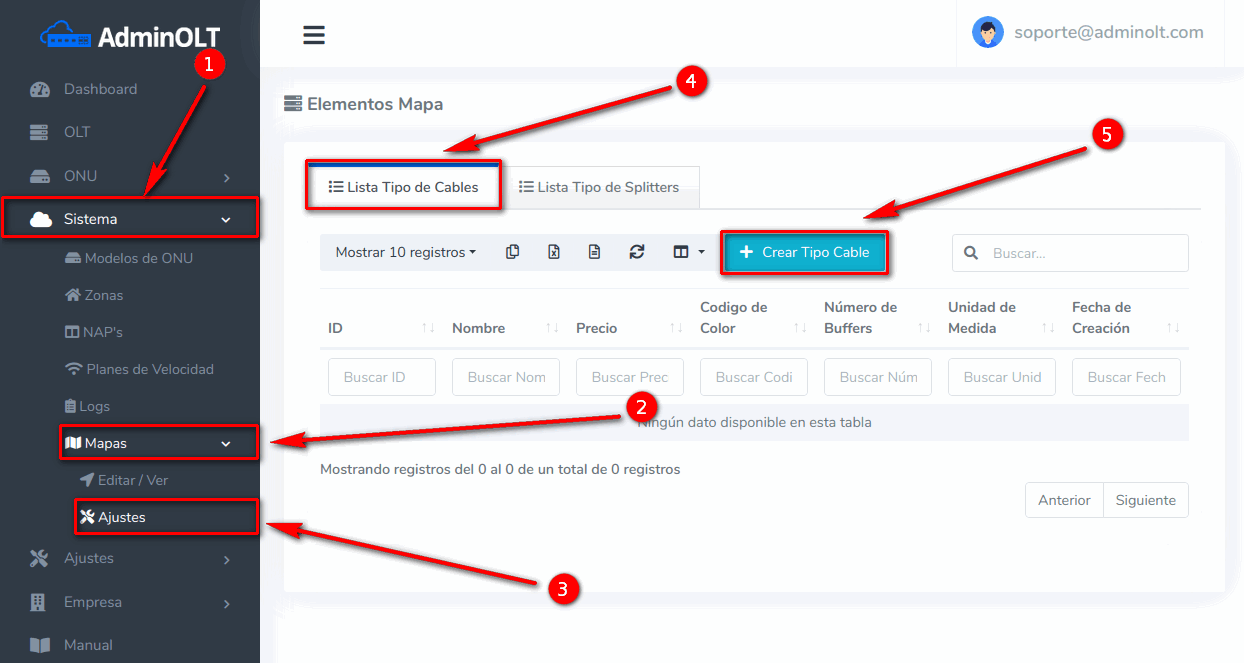
Add a Cable Type
1 Go to the System > Maps > Settings > Cable Type List section, and click on Create Cable Type
Fill in the information about the cable.
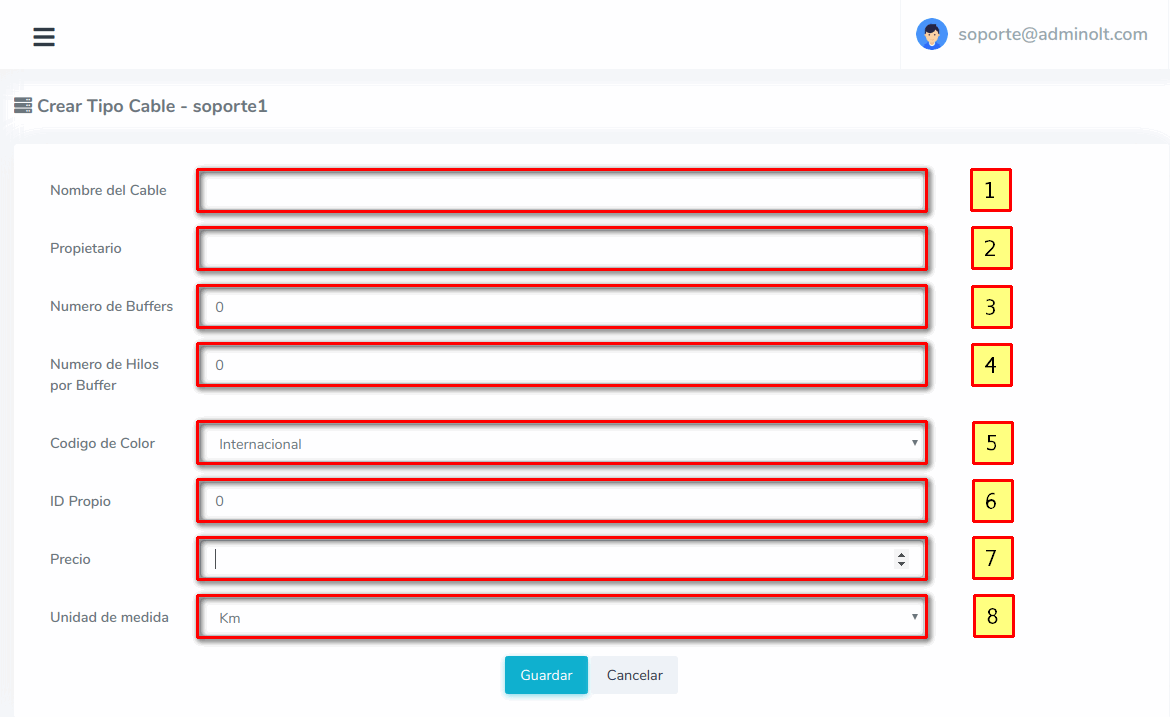
- 1.- Cable Name: Will be used to identify the cable when creating cables on the map.
- 2.- Owner: It is necessary to enter an owner for better control, and this will also be useful for future updates.
- 3.- Number of Buffers: Is the amount of buffers the cable will have, it is important to enter the correct number as it cannot be edited, and it will also help for future updates.
- 4.- Number of Threads per Buffer: Is the number of threads each buffer will have, the total number of threads per cable will be calculated by multiplying the number of threads by the number of buffers. Example: A cable with 4 buffers and 12 threads per buffer, then the total is 4 x 12 = 48 threads.
- 5.- Color Code: Is the color code(order) that will be used for future updates.
- 6.- Own ID: Identifier for better administration of your company, only accepts numbers less than 32767.
- 7.- Price: Price of the cable, will be used for future updates, this price is per unit of measure specified in the next option.
- 8.- Unit of Measure: Used to calculate the total price of the cable used.
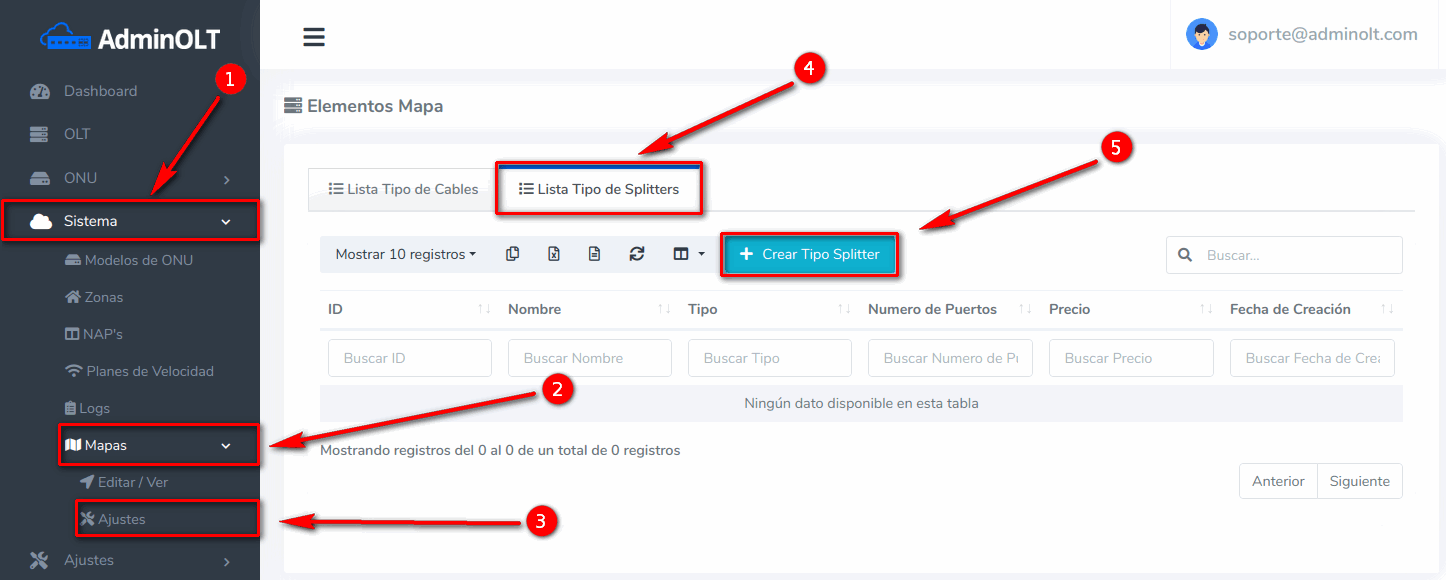
Add a Splitter Type
1 Go to the System > Maps > Settings > Splitter Types List section
Fill in the information about the Balanced splitter type.

- 1.- Splitter Name: Will be used to identify the splitter when adding it to a NAP.
- 2.- Manufacturer: It is necessary to enter an owner for better control, and this will also be useful for future updates.
- 3.- Connector Type: Specified to see in the map the corresponding color (blue or green).
- 4.- Type: It is important to take into account as it will be used for future updates.
- 5.- Number of Ports: Is the number of ports the splitter will have.
- 6.- Price: Price of the splitter, will be used for future updates when calculating the network price.
Fill in the information about the Unbalanced splitter type.

- 1.- Splitter Name: Will be used to identify the splitter when adding it to a NAP.
- 2.- Manufacturer: It is necessary to enter an owner for better control, and this will also be useful for future updates.
- 3.- Connector Type: Specified to see in the map the corresponding color (blue or green).
- 4.- Type: It is important to take into account as it will be used for future updates.
- 5.- Number of Ports: Is the number of ports the splitter will have, in this case defined with 2 ports.
- 6.- Unbalanced Port #1: Percentage of loss on port 1
- 7.- Unbalanced Port #2: Percentage of loss on port 2
- 8.- Price: Price of the splitter, will be used for future updates when calculating the network price.
Add a Rack Type
This step is important because we need a Rack to be able to add our active devices, which we will use to connect threads and know the powers at each point on our map.
1 Go to the System > Maps > Settings > Rack Types List section

Fill in the information about the rack type

- 1.- Rack Type Name: Will be used to identify the rack type when adding a rack type marker to the map.
- 2.- Manufacturer Name: It is necessary to enter an owner for better control, and this will also be useful for future updates.
- 3.- Code: Used to keep internal control.
- 4.- Image: Image of the rack type
- 5.- Price: Price of the rack type, will be used for future updates when calculating the network price.
Add an Active Device
In this section, we will add active devices like the OLTs that we will use to map our network. Adding these devices is important because they will mark the beginning of our tracings, and we will need them to calculate powers.
1 Go to the System > Maps > Settings > Active Devices List section

Fill in the information about the active device

- 1.- Device Name: Will be used to identify the device when adding a rack type marker to the map.
- 2.- Manufacturer Name: It is necessary to enter an owner for better control, and this will also be useful for future updates.
- 3.- Technology: Used to identify if it is GPON or EPON.
- 4.- Device Type: Currently only OLTs are managed.
- 5.- Price: Price of the device, will be used for future updates when calculating the network price.
- 6.- Initial Index: The initial number handled by the OLT.
- 7.- Image: Device image
- 8.- Device Icon: Specifies the type of OLT, the icon will probably be used in future updates.
- 9.- Number of Cards: Specifies how many cards our OLT manages.
- 10.- Card Name: Specifies a name to identify the cards, for example GPON 0/1
- 11.- Card Number: Specifies the card number or slot number.
- 12.- Pon Port Quantity: Specifies the number of pon ports the added card has.
- 13.- Signal Type: We can use signal 1310, 1490 or 1550
Example:
Let's say we have a Huawei MA5800-X15 OLT and we want to add it, now our equipment has 3 cards.
Name
Card Number or Slot
Port Quantity
Signal Type
GPON 0/2
2
16
1310
GPON 0/4
4
8
1310
GPON 0/11
11
16
1310
Then what we will do is register our device as follows:

VIDEOTUTORIAL
April 12, 2024, 3:32 p.m. - Visitas: 19011